Acura engine service and repair manuals | Acura Integra engine removal and installation (Part 1)
The manual are written specifically for the do-it-yourselfer with step-by-step procedures for the first-time user:
* Make sure jacks and safety stands are placed properly and hoist brackets are attached to the correct positions on the engine. Apply parking brake and block rear wheels so the car will not roll off stands and fall while you are working under it.
CAUTION:
* Use fender covers to avoid damaging painted surface.
* Unspecified items are common.
* Unplug the wiring connectors carefully while holding the connector portion to avoid damage.
* Mark all wiring and hoses to avoid misconnection. Also, be sure that they do not contact other wiring or hoses or interfere with other parts.
Be sure to get the customer's code number before.
- Disconnecting the battery.
- Removing the No. 14 (15A) fuse.
- Removing the radio.
After service, reconnect power to the radio and turn it on. When the word "CODE" is displayed, enter the customer's 5-digit code to restore radio operation.
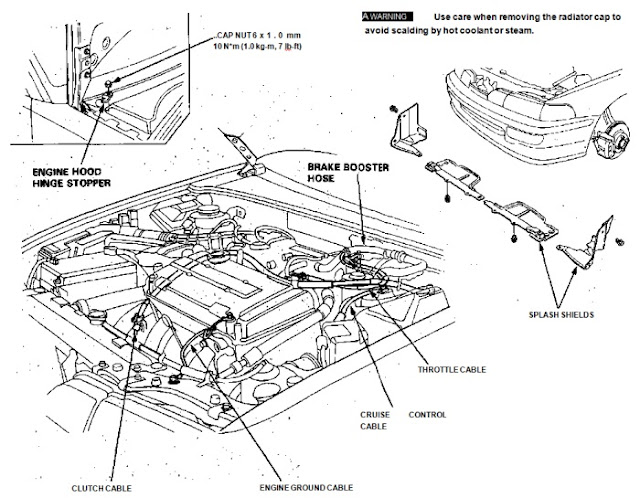
1. Remove the engine hood hinge stopperes.
2. Secure the hood as far open as possible.
3. Disconnect the battery negative terminal first, then the positive terminal.
4. Remove the radiator cap.

fig. 1. Acura engine service and repair manuals | Acura Integra engine removal and installation
5. Raise the hoist to full height.
6. Remove the front wheels and the engine splash shields.
7. Drain the transmission oil/fluid. Reinstall the drain plug using a new washer.
8. Drain the engine oil. Reinstall the drain plug using a new washer.
9. Lower the hoist.
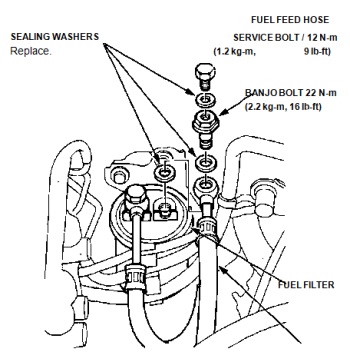
10. Relieve fuel pressure by slowly loosening the service bolt on the fuel filter about one turn, then remove the fuel feed hose.

fig. 2. Acura engine service and repair manuals | Acura Integra engine removal and installation
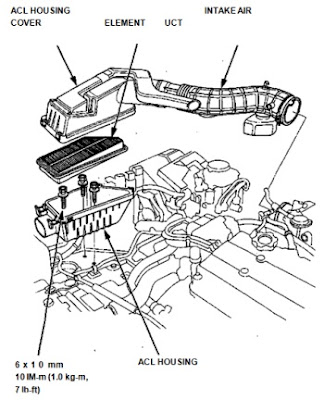
11. Remove the intake air duct and air cleaner (ACL) housing.

fig. 3. Acura engine service and repair manuals | Acura Integra engine removal and installation
